Tutorial #3 - Addendum:
further explanation of NPC editing
Materials List:
IFFPencil2
complete skins (i.e. body and head textures with their meshes)
pen and paper
IMPORTANT!!
BEFORE STARTING ANY TYPE OF HACKING/EDITING TO YOUR OBJECT(S), BE SURE TO MAKE A COPY AND STORE IN A SAFE PLACE. That way, if you mess something up or something doesn't work right, you still have the unchanged object.
This is a bit more in-depth pictorial of how to change the physical appearance (the skin) of your custom NPC.
First of all, you'll need your complete skin - head, body, even hands, nude, and buyables (if you want to change them). Keep in mind that whatever you don't change will stay the same as the NPC you cloned (provided the skins are in your game). Now, for the mesh name, you want what's called the "internal" name. This is the mesh name without the "xskin... BODY" or "...HEAD" part (essentially, the CMX name). I know that doesn't make much sense in words, put as we go along hopefully the pictures will help.
Click on an image to enlarge.
STEP 1:
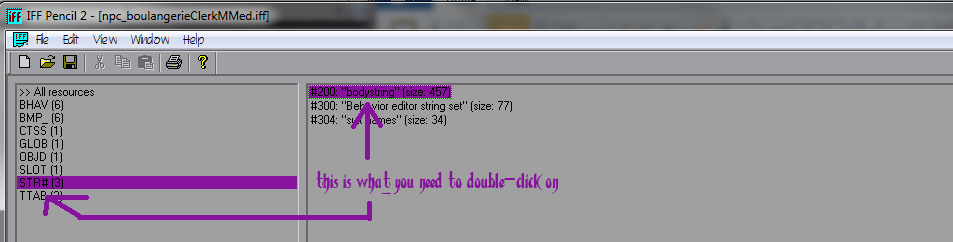
Open your NPC's IFF in IFFPencil2. Click on the STR# resource, then the bodystring (Fig-1).
STEP 2:
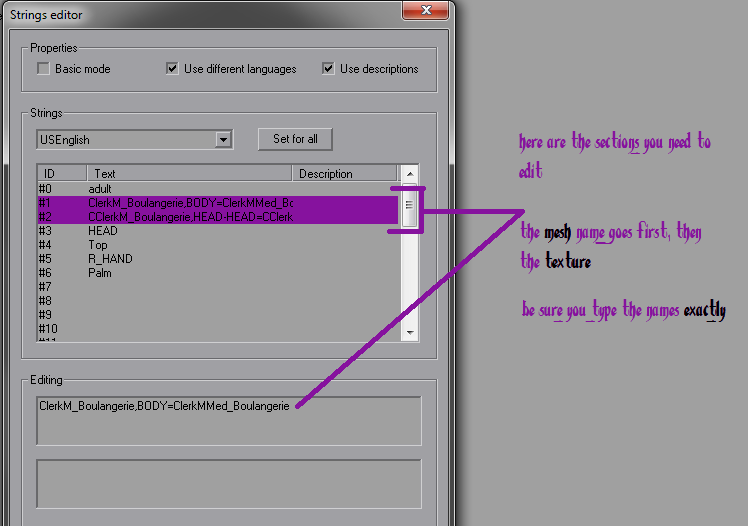
Locate the body and head lines. They're almost at the very top. Click on each line, and you'll see the corresponding info show up in the lower box. This is where you will edit. The MESH name comes first, then the TEXTURE. DO NOT delete the "BODY" or "HEAD-HEAD" sections (Fig-2).
STEP 3:
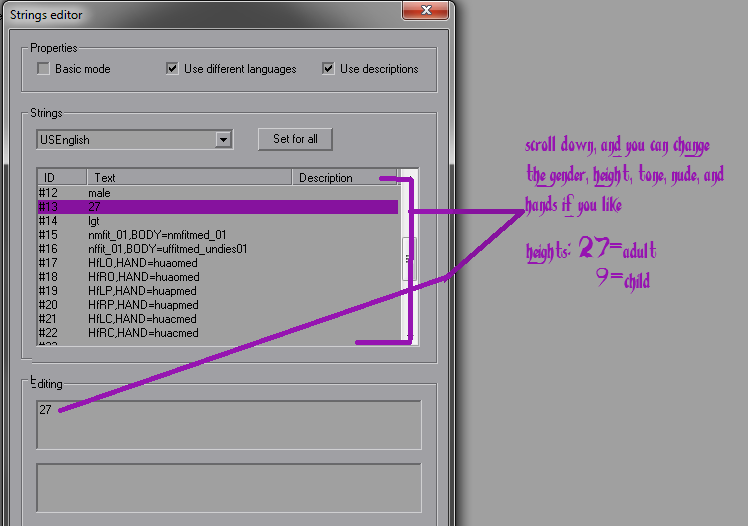
If you want to change the hands, nude, buyables, etc., scroll down and you'll see gender, height, tone, nude, and so on. You can edit these in the same way as the body and head (Fig-3).
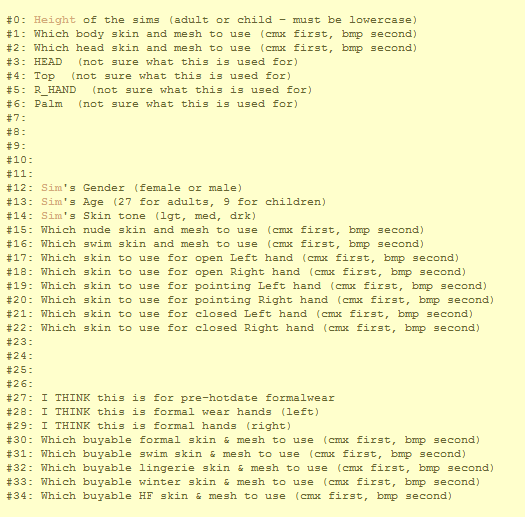
For an explanation of what each line is, refer to the chart below (Fig-4). Chart courtesy Simblesse Oblige.
That's it! Save and close. Test in your game, making sure you've installed all of your skins as well.
Good luck!