Tutorial #3:
changing NPCs for custom registers or podiums
Materials List:
T'mog
IFFPencil2
FAR Out (or any program that will extract from FAR files)
complete skins (i.e. body and head textures with their meshes)
pen and paper
IMPORTANT!!
BEFORE STARTING ANY TYPE OF HACKING/EDITING TO YOUR OBJECT(S), BE SURE TO MAKE A COPY AND STORE IN A SAFE PLACE. That way, if you mess something up or something doesn't work right, you still have the unchanged object.
So you've cloned a register (or restaurant podium, or hotel desk), and want to create custom NPCs for it as well. Fear not, dear Simmer! It's not difficult at all; it just takes a little time. (You can choose to only have 1 skin tone/gender if you like - more on this as we come to it).
I know there are some great tutorials that cover this (such as Wilf's), but hopefully this one will be a little easier for the laypeople (lay-Sims?).
Our example for this tutorial is a clone of the Unleashed register.
STEP 1:
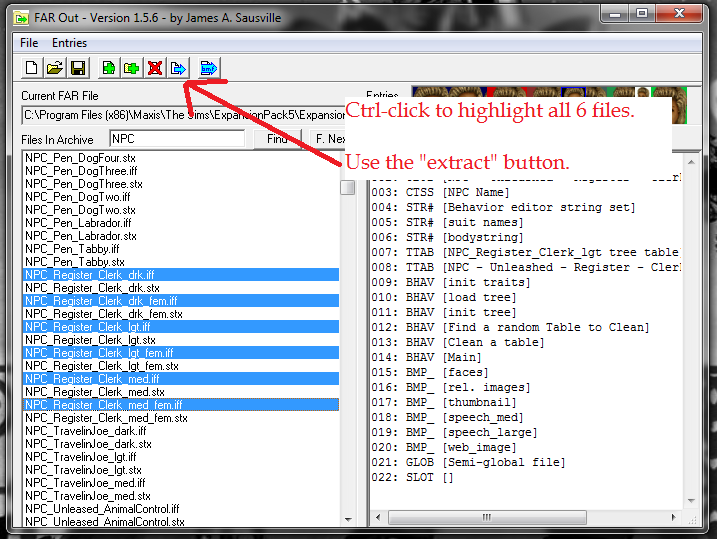
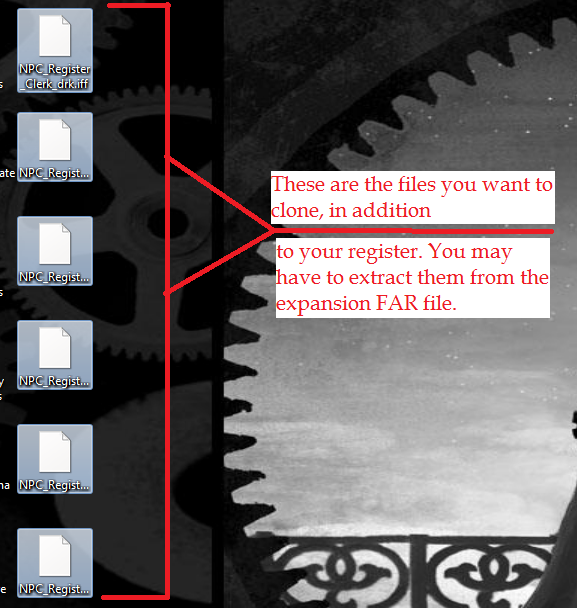
You will need to extract the NPC files that go with your register. Since we're using the register from UL, we'll open ExpansionPack5.FAR and find the files (Fig-1). You can just type "NPC" in the "find" box and go 'til you find the register files (they'll say "clerk"). Extract them somewhere (Fig-2) they'll be easy to find (I usually go with the desktop).
If you only want 1 clerk, then clone the NPC that you want (light male, medium female, etc).
STEP 2:
COPY the NPC files to your GameData/Objects (or UserObjects, or Downloads, or anywhere T'mog will find them), and clone them and your register. You can rename the clerks at this time, if you choose (edit the name in the description window). Close T'mog.
STEP 3:
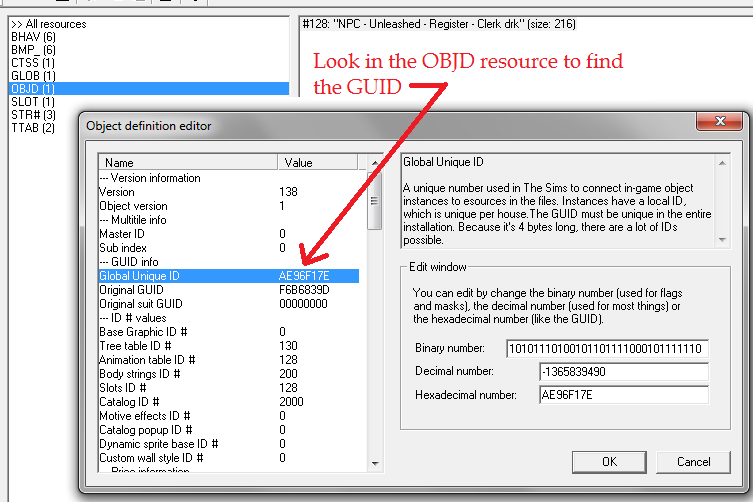
Open each original NPC file in IFFPencil2. Write down the GUID (Fig-3). Do the same for your cloned NPC files. It may help to make it in a little chart form.
STEP 4:
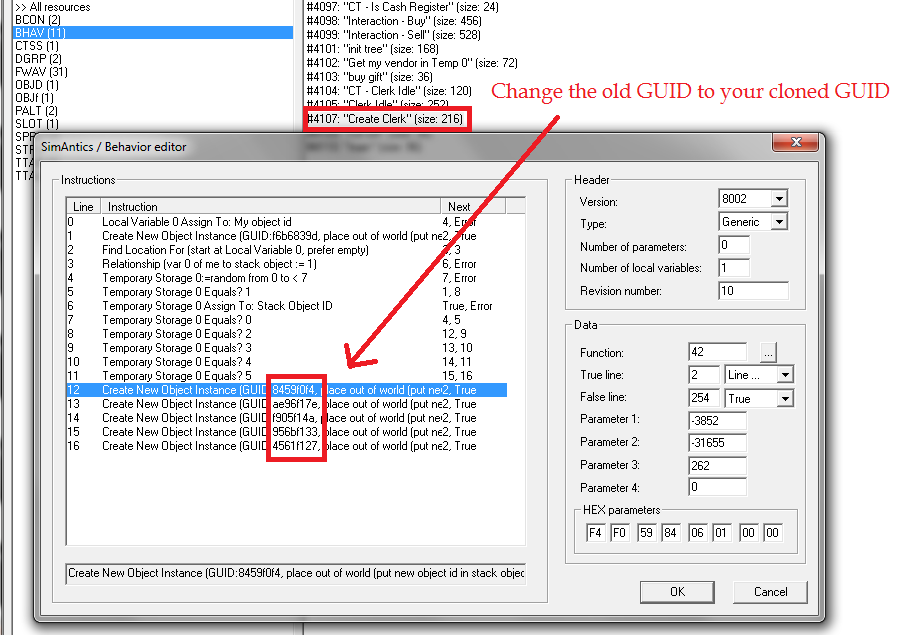
Open your cloned register in IFFPencil2. Go to the BHAVs section, and double-click on #4107 "Create Clerk". Change the GUIDs to your custom ones (Fig-4). This is where your charted GUIDs will help, since you'll need to replace the dark male clerk with a dark male clerk, etc.
If you've chosen to only have 1 NPC, then replace every original GUID with your 1 custom one.
To change the GUID, click on the line you want to edit, and look in the bottom right corner, at the HEX parameters section. You will type the new GUID here, but you will need to reverse the order of the characters. So, if your custom GUID is A1 B2 C3 D4, you will enter it as 4D 3C 2B 1A. You can check to make sure it's correct by looking at the highlighted line.
STEP 5:
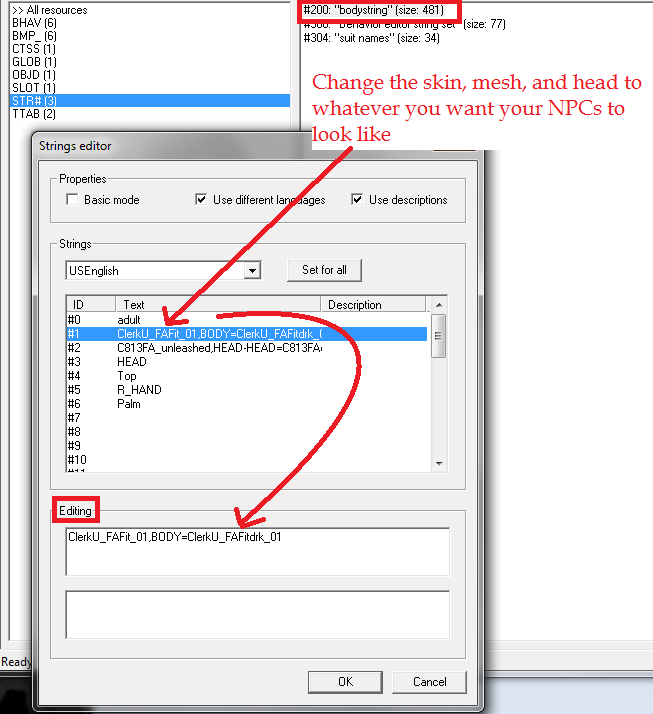
Open your custom NPC files in IFFPencil2. Click on the STR recsource, then #200 bodystring. This is where you will edit the appearance of your clerk(s). You'll notice the mesh and texture info for body and head. Change these to whatever skins you have chosen. You MUST type the names EXACTLY as they are spelled, otherwise the game won't find them (Fig-5). You can use custom skins, or use Maxis ones.
The mesh name comes first, then the texture. DO NOT erase the "BODY=" or "HEAD=" parts.
Page 2 will cover the extra steps you need if you're cloning a podium.